Teacher Tool Explanation

How do I use the portal?
A detailed explanation manual
To maximise efficiency when you use the Sonic Phonics Teacher Tool, we encourage you to read through our manual below to understand how each aspect can enhance the connection between your teaching style and your students’ learning.
Quick Start Guide
Step 1: Log in as a teacher
1. Go to the Sonic Phonics Teacher Tool link sent to your email by your Admin
2. Enter your teacher email and password
3. Click “Log In”
Step 2: Access your classroom
1. Once logged in, you’ll land on your Dashboard
2. Click “My Class” to manually add students via the ‘Add Students’ button
Step 3: View QR Codes for Students
1. Click the “QR Codes” button in your class view
2. Automatically generated QR codes will appear for each student
3. Choose “Download All” or print individual QR codes via PDF
4. Use QR codes on lockroom walls, folders, or tables for quick student logins
Step 4: Students Log In with QR Codes
1. On the student device, open the Sonic Phonics app on the School page
2. Click “Log In with QR Code”
3. Students scan their personal QR code using the device camera
4. They’ll be instantly logged into their profile
Step 5: View Student Progress
1. From your class list, click on any student’s name
2. You can view:
- Live progress
- Stars earned
- Number of attempts
- Colour-coded performance
- More!
Step 6: Understand the Bell Curve
1. The bell curve shows the overall class performance distribution
2. Each colour represents a performance band as mentioned
Step 7: Need Help?
Click the “Help” icon anytime [ question mark on the bottom right of the page ]
View tool-tips on the bottom of the tool home page
View the FAQ page on our website
Still need support? Email: [contact@sonicphonics.co.nz]
Feature Walkthrough
Dashboard
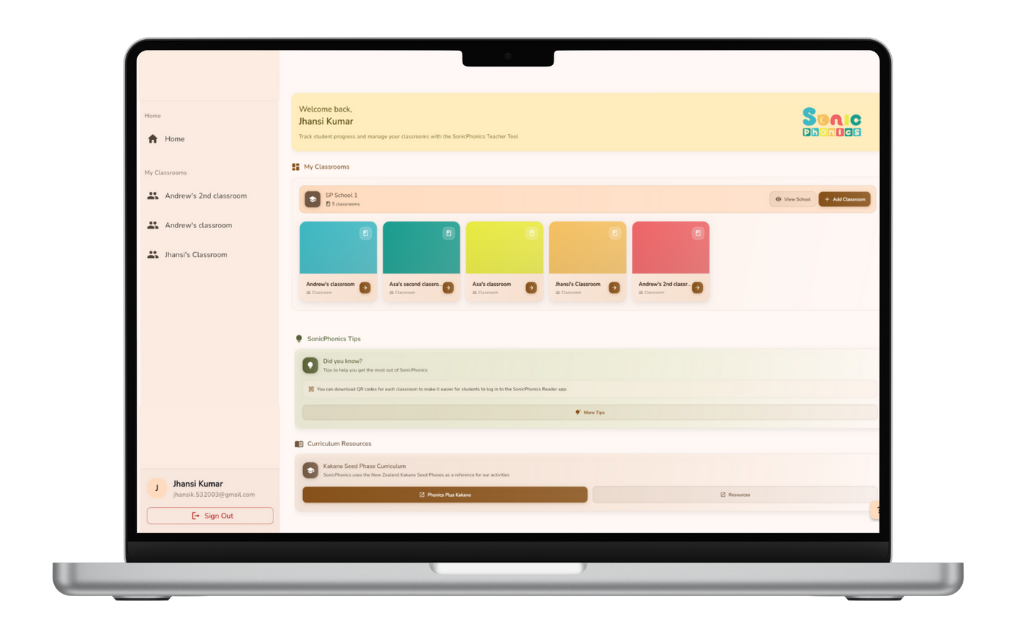
The dashboard/homepage is your bird’s-eye view of classes. You can view your invites to your classrooms sent from admins, as well as an overview of your school and the classes within it.
Tips:
Use the ‘Search classroom’ → If you have plenty of classrooms and/or sub-rooms, you can easily access them via the ‘Search Classroom’ tab at the top.
Add Sub-Classrooms → Alongside adding classrooms, you can make sub-classrooms to organise a certain group of students together. For example, children who need specialised care from a specialist can be added to a sub-classroom.
Look for patterns → If a classroom is highlighted in red with a number, it means that a certain number of students need immediate help with their progress./
View classrooms → You can archive classrooms in the Teacher Tool when they are no longer in use, such as when students age out of the app. Archiving is done through ‘View School > Edit > Un-toggle Active Status’. Once archived, the classroom will be hidden from your Home page but still visible in the ‘View Schools’ page for future upkeep, keeping your view clear. If you need to move students before archiving, use the Move Students option to place them in their new class. This helps keep your classrooms organised and up to date.
The Class Overview
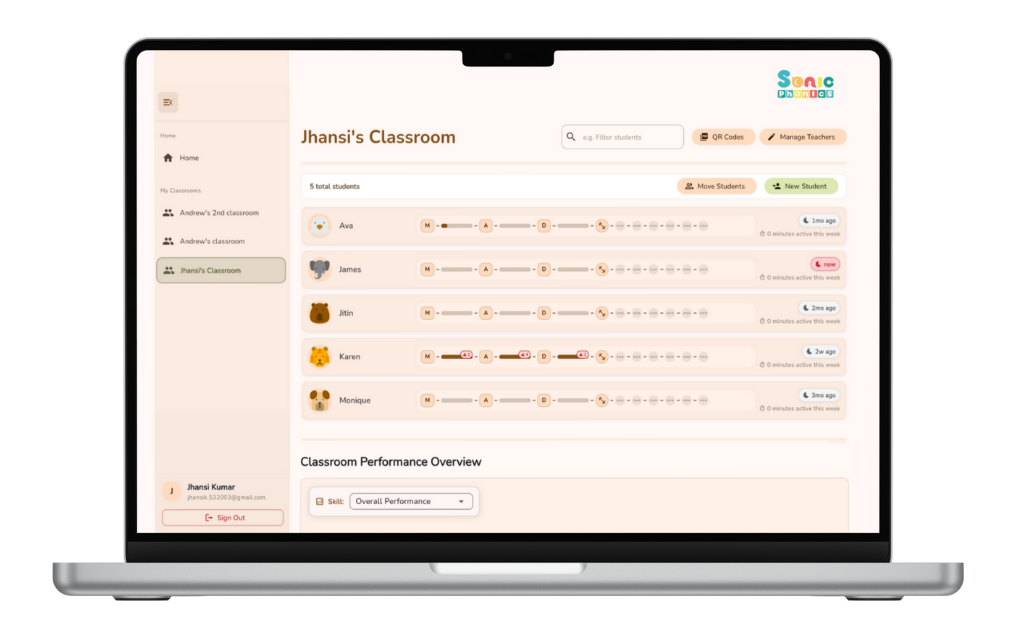
The Class Overview shows up when you click on a specific classroom. This page gives you a quick snapshot of every student in one place, all customisable for your comfort. You’ll see progress, stars earned, and skill levels so you can plan group work easily.
Tips
Bell Curve Data → Students will be shown where they sit in performance on the Sonicphonics app, compared to other students in the class. Clicking on them will also lead to their page.
Practice and Cumulative progress → At the top, you can view each overall progress bar. The puzzle symbolises that they’re in the teaching and learning phase, and the blocks + bars after the middle show practice activities. Each activity is shown as a star and coloured according to its accuracy rate [example: red star means poor performance]. Clicking on this will take you to a more detailed individual page.
Class Trends → You can use the dropdown box in the middle of the page in ‘Attempts Before Mastery’ to filter the class’s performance on a certain set of letters in order. The trend colours are determined by the rounded-up class accuracy of achieved stars, alongside the time it takes on average to complete a letter.
Student Profiles
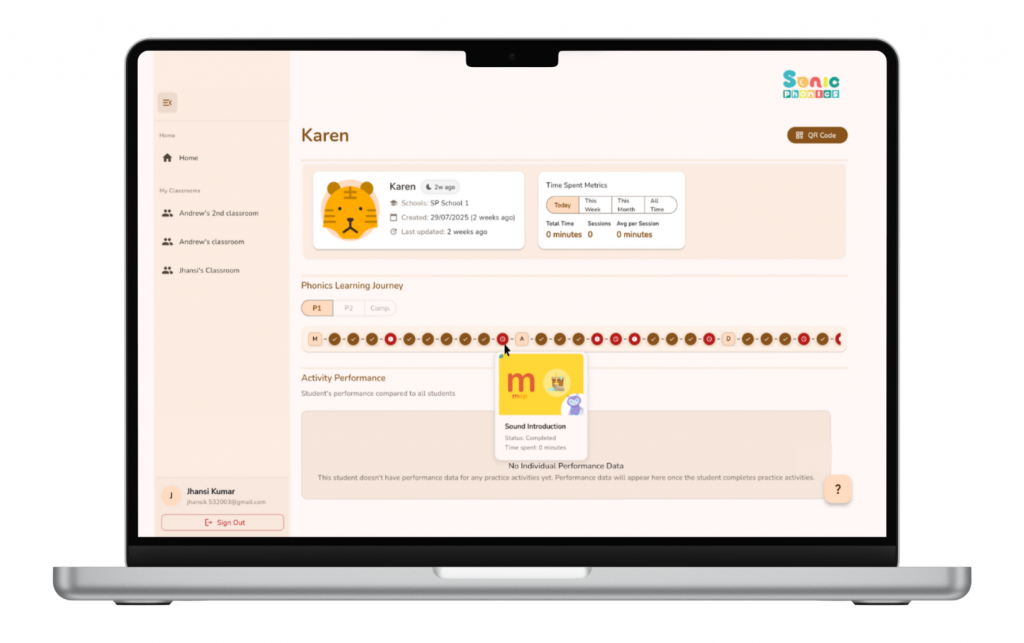
Student Profiles let you zoom in on one learner at a time. You’ll see their wins, challenges, and progress over time—perfect for targeted support or parent updates.
Tips:
Spot individual overviews → At the very top, you can see the quick preveiw of the childs overall performance in the app. Green shows that the child is progressing and sitting at average+, whereas an alert red shows the child needs attention to a specific aspect [i.e. too much time spent on an activity shows the child is struggling on that activity more than others].
View Progression → The special learning journey of each child is displayed in this area. KI, K2 and K3 represent the Kakano Seed Phases of the NZ Learning Curriculum. By finishing K3, the child has learnt all 33 letters and could move on to words.
Notice struggles → Hover over the progress bar circles to view where the child is at or is struggling. Flagged red circles might indicate the need for in-class reinforcement. As we know, Sonicphonics uses a 3-star system that shows how confidently the child performed: 1–3 stars based on accuracy and consistency. This is shown in a timeline similar to the classroom page; however, it is now clickable for more detail and to specify which activity.
Access detailed skills → The Learning Paths section allows you to filter between skill sets, such as pronunciation and handwriting, to see where the child is sitting in comparison to either the classroom or globally. Activities that the child is struggling with will automatically be above others for your attention.
Bell Curve Graph
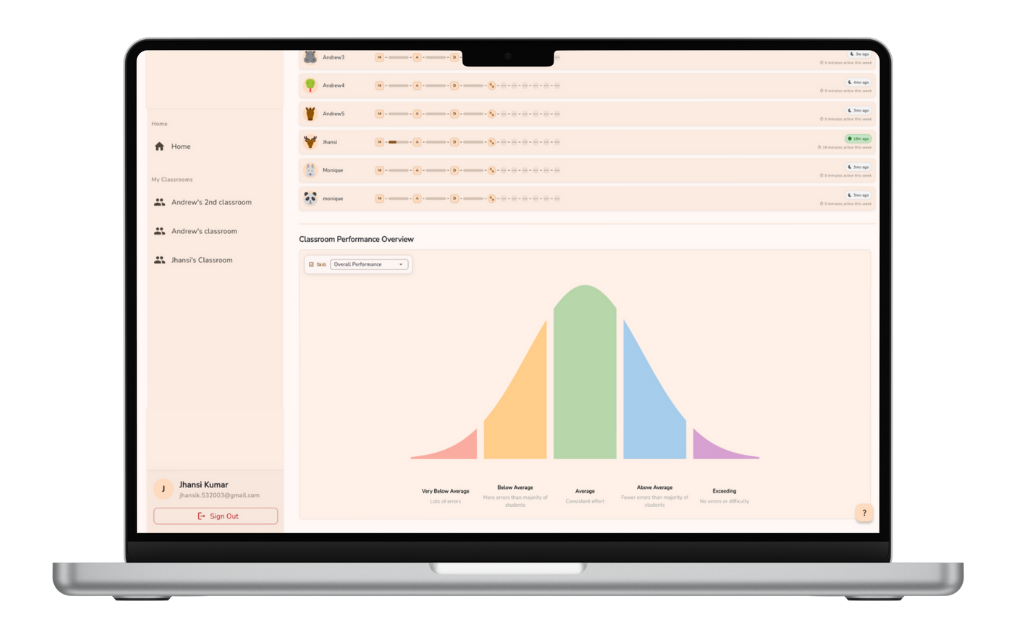
Bell curve graph: detailed explanation and tips
Tips:
Look for patterns – A lot of students on one side of the curve might mean it’s time to review or extend the teaching to in-person intervention.
Focus on the middle – The middle green symbol represents the class average. Students in the middle range are ready to be pushed forward, while still keeping an eye on those at each end.
Check changes over time – Open the graph each week to see if students are moving towards the middle or higher end.
Use colours as clues – Each section’s colour links to the same colours you’ll see in student profiles and additional flags.
In-tool Hints and Tips
Printing our QR Codes and sticking them to your classroom tables allows more initiative and easy access to SonicPhonics in the class!
Hover over any section of the bell curve to instantly see which students fall into that group.
Idea: You can use QR code cards to set up independent learning stations or rotations—students can rotate without needing you to log them in
Bookmark your Dashboard: skip straight to your class view every time you log in.
Want a quick snapshot? The class bell curve tells you more in 5 seconds than a full report.
Common FAQ’s
To come soon!